Your Finest Hour is the first level of D-Day, the first mission in Medal of Honor: Frontline. It occurs on D-Day, June 6, 1944, at Omaha Beach.
Summary[]
This mission is meant to give you an adrenaline pumped introduction into the game as well as a quick tutorial of the game's controls and mechanics.
Objectives[]
- Meet the Captain on Shore
- Rescue 4 Pinned Down Squad Members
- Rejoin Squad At Shingle Embankment
- Rescue Engineer at End of Embankment
- Rendezvous with Captain at Base of Bunker
- Cross the Minefield and Man Machine Gun
- Destroy MG Nests on Ridge
- Eliminate Enemy Soldiers in Trench
Weapons[]
- M1 Garand
- M1911 Colt .45
- M1A1 Thompson
- MG-42 (mounted)
Characters[]
- Lt. Jimmy Patterson
- The Captain
- Squadmates 1 through 4
- Ivarsen
- Pvt. Jones
- Coxswain
Vehicles[]
Plot[]
The Captain providing protection as Jimmy rushes to the aid of his fellow squadmates.
Lieutenant Patterson decides that the Allies will need every available soldier to storm Fortress Europe on D-Day. He makes it back to the USS Thomas Jefferson in time to board a Higgins LCVP and get to the beach. He is tasked with destroying the bunkers defending the sea wall. When they are destroyed, the Captain tells him about a special mission that he will need to go on.
Transcript[]
Three battleships are off in the distance firing volleys of shells at the coast. The camera pans down through the incoming LCVP Higgins boats. It focuses on one. As the camera moves down the boat, one soldier coughs, another vomits. The soldier standing next to Lt. Jimmy Patterson crosses his chest. Two Allied aircraft fly over head and the player takes control of Jimmy.
Several mines explode ahead of the boat.
Coxswain: "Bandit! Nine o'clock! Heads down!"
An fighter plane flies in from the left, strafing the water with bullets. He hits the LCVP to the left and it explodes. All of the soldiers inside are killed and the boat begins to sink. It crashes into Jimmy's boat but does no damage.
Mines continue to explode all around the boat.
Coxswain: "Thirty seconds!"
Captain: "Alright! Listen up! When the ramp drops, move out! If you get lost, look for me!"
Even more mines explode around the boat as it gets closer to the shore.
Coxswain: "Ten seconds!"
Captain: "Stay with me and we'll get through this! We've gotta take that beach!"
The boat stops.
Coxswain: "Clear the raft!"
The ramp lowers. The Captain barely makes it out before a bomb hits the boat and sends Patterson and the entire squad into the water. When Patterson lands in the water, seven men are already dead and floating to the bottom, from being shot. Two more soldiers attempt to make it to the surface but are shot while running up the slope.
Patterson makes it to the surface and withdraws his M1 Garand rifle.
Captain: "Patterson! Over here! Get over here!"
Patterson runs to the Captain who is hiding behind one of the larger pieces of destroyed LCVP.
Captain: "We've got a hell of a mess here, that artillery strike scattered what's left of our squad all over the beach. Four of our members are over there. Help them move up the beach to the sea wall!"
Just as he finishes talking, a soldier runs up the beach and hits a pole mine sticking out of the ground.
Captain: "Dammit! I'll give you some covering fire! Now move out!"
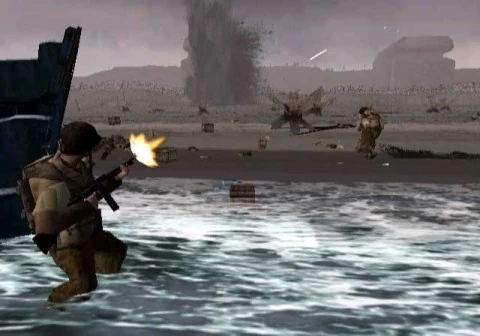
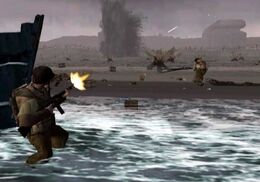
The Captain leans out to fire at the enemy bunkers as Patterson runs across the beach. The first squadmate is kneeling behind an obstacle.
Squadmate 1: "Get over here! I'm pinned down by fire from that bunker! I need cover!"
Patterson fires enough shots at the bunkers for the soldier to make a run for it. He makes it to the embankment. As Patterson runs to get to the second squadmate, he comes across a medic helping a wounded soldier by a hedgehog obstacle. As the medic prepares a syringe the wounded soldier is shot. The medic shakes his fists in frustration and is then shot himself. Patterson runs to the second squadmate.
Squadmate 2: "Gimme some cover and I'll get the hell outta here!"
Patterson repeats the process, shooting the bunker enough to cover the soldier. He makes it to the embankment as well. As Patterson is running for the third squadmate he makes for a crater but the soldier inside is hit by an artillery strike and is killed. In a nearby crater, the third squadmate is covering behind a nearby obstacle.
Squadmate 3: "Gimme some covering fire!"
After shooting at the bunkers enough, the third man makes a run for it. He also makes it to the embankment. Patterson spots the final lost squadmate and runs to him.
Squadmate 4: "Help me move up the beach to the sea wall!"
Patterson fires again. The final soldier runs for it. A German fighter aircraft strafes the beach, barely missing the squadmate. The plane circles around, trying to hit Jimmy, but misses and flies away. Patterson runs up to the sea wall to join his squad.
Captain: "Ivarsen! Get out there and retrieve those bangalores!"
Ivarsen runs but is quickly cut down by German machine gun fire.
Captain: "Dammit! We gotta get the wire clear! Patterson! You're up! Get over here! Private Jones has enough bangalores to clear a hole in the wire! But he's pinned behind that Belgian gate down the line! Help Jones back to our position! We'll give you cover fire! Wait for my order! Covering fire! GO GO GO!"
As all the soldiers fire, Patterson runs down the embankment to the Belgian gate where Private Jones is holding out.
Pvt. Jones: "HEY! Over here! Patterson! I won't make it back with this load of bangalores unless you give me cover! Stay behind me and keep shooting! Ready?"
Patterson picks up Jones' dropped Thompson SMG and fires at the bunkers. Jones runs.
Pvt. Jones: "Stay with me Patterson! Watch for fire from those bunkers!"
Jones trips on his way but the two make it back safely.
Captain: "Good work Patterson! Alright Jones lets blow this fence!"
Jones shoves the bangalores into a depression in the embankment. He dives away.
Captain: "Fire in the hole!"
Pvt. Jones: "Fire in the hole!"
The massive explosion clears away the wire.
Captain: "We've got cover! There's a defilade on the other side! Everybody over the sea wall!"
The squad moves. Jones advances into the minefield by himself and is hit by two mines, killing him. The rest of the squad stay at the base of the bunker.
Captain: "Patterson! Get over here! Now! We'll never get inside that bunker unless we loose the two machine gun nests guarding it. Patterson, if you can make it across that minefield to the turret, you can use it against those nests up there. We'll cover you. Covering fire!"
The soldier nearest to the bunker edge opens fire with his M1 Garand. Jimmy finds away around the minefield that killed Jones and into the trench. He encounters two Wehrmacht soldiers but swiftly defeats them. He climbs up a ladder to the turret and uses it to quickly demolish the machine gun nests on the ridge. A squad of eight soldiers emerge from the nearby bunker and attack from the trench but Patterson easily defeats them with the MG-42. The rest of the squad runs across the minefield. Only the Captain and two others make it. The Captain enters the trench with Patterson as the two others hide under the bunker.
Captain: "Watch out!"
An explosion blocks the trench entrance with debris.
Captain: "You've earned your pay today Patterson! Now let's move out!"
Trivia[]
Easter Eggs[]
- Some of the dead bodies on the beach will have names on them. These include Rus K, Bell B and Nash D.
- One of the bodies on the shore have the name,RIIS K., inscribed on the rucksack. It is a pun of the word risque.
- When Private Jones runs into the minefield, looking at his arms shows that he is in an animation where he looks like he is holding a gun but really isn't.
- If you remain in the water near one of the two Higgins boats, you can shoot and kill any American soldiers submerging from the water. Once they reach land, they become invincible to your bullets, however.
- On the YouTube page for the "Leave a Message" trailer for Medal of Honor, it was said that the "Leave a Message" trailer was inspired by the cutscene at the start of Your Finest Hour, except with modern settings.
- This level makes numerous references to the movie Saving Private Ryan. A lot of the visuals come from the movie, such as the soldier throwing up, the LCVP getting blown up, the soldiers getting shot underwater, the MG nest on the hill that has to be destroyed, the squad giving covering fire around a corner of a bunker, and having to use Bangalore torpedoes to break through the fence and "bank".
- The entire level's layout (as well as several ambient life scenes) are direct homages to the 1998 war film Saving Private Ryan, which Steven Spielberg (the game's director and producer) also directed.
- The medic struggling with a wounded soldier encountered in the far east area of the beach are intended to be exactly the same characters seen in the beginning of the film Saving Private Ryan. In the film, the medic is struggling to save a dying infantryman. However, a moment after the saving of the soldier's life was guaranteed, the wounded soldier is killed by an unseen sniper. The medic then gives the unseen sniper the middle finger in rage before being killed by the same sniper. Although this scene occurs in the game, the gore as well as the unseen sniper are not present, possibly due to graphic limitations or being deemed too graphic for a T-rated game.
- The level takes place at the Dog Green sector of Omaha Beach.
Mistakes/Glitches[]
- When examining the soldier with the M1 Garand leaning against the bunker wall closest to the minefield, it can be noted that he is firing the rifle at a rate of nearly three times faster than the one used by the player during the game. This bug may have been overlooked by the developers.
- If you pause the game in the PS3 remastered version, all ambient sound effects will stop; leaving the level almost completely silent.
Miscellaneous[]
- At the beginning of the level, MG42 bullets kill soldiers while they're underwater. This would not happen in real life, because when a bullet hits the water, it loses speed.
- There is a second Thompson located on the beach. It is in the water on the far left of the map.
- The level bears some resemblance to the version of Omaha Beach seen in, Medal of Honor: Allied Assault.
- This level, along with Into The Breach, are the only levels with no musical score. This may be another reference to the film Saving Private Ryan, as the Normandy scenes are left unscored in the film to accentuate the gritty realism of the battle.
- At the beginning of the level you can see that the soldiers in the other boats have different uniforms. On top of that, some of them don't have heads.
Gallery[]
")
")
")
")